💌 Create a Mother's Day Card
What you will create
Motivation
Show your Mom how awesome she is by expressing how you feel through your own creativity. In this project, you will learn how to build a web card that is customizable in so many ways. Throughout this workshop you will be given ample time to explore your own ideas. At the end, you will be shown how to send your card by just sending a link. It will look good on any device that has a browser.
Strategy
Setup
- Create your coding space at https://www.qoom.io
- Take our quick poll at https://app.qoom.io/~/web_card
1. Setting up the pieces (**HTML**)
In setting up the pieces, we will take a 'top down' approach. This is because, when the browser reads your HTML file, it reads it from the top down.
Basic HTML terms:
TAG: A command in HTML that looks like
<TAGNAME>.The browser will do certain things depending on whatTAGNAMEis. For example<img>will tell the browser to display an image. Here is a list of tags that you can use.
ATTRIBUTE: An instruction that goes along with the
Tagcommand to give the browser more details on what to do. For example thesrcattribute in<img src='myimage.png'>tells the browser what image to display.
ELEMENT: A box that holds a set of commands to tell the browser what to do. For example, in this project you will create a
mainelement that will tell the browser all it needs to know to display your web card.
Card
If we look at our example, you can see that there is a card with two parts: a cover and a message. In HTML you need to define an element that holds its parts. This is called a container element. We will use the <main> tag to represent this. We will put this in our <body> element so that we can see it in the browser like so:
<body>
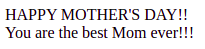
<main id='card'>HAPPY MOTHER'S DAY!!</main>
</body>
We gave the <main> element an attribute, id = 'card' so that we know what that element represents.
Card Cover
Since our card has two parts. Lets put the HAPPY MOTHER'S DAY!! message on the cover like so:
<main id='card'>
	<section id='cover'>
		HAPPY MOTHER'S DAY!!
	</section>
</main>
Feel free to now change the text you would like to have on your card cover.
Card Message
Now for the second part: message:
<main id='card'>
	<section id='cover'>
		HAPPY MOTHER'S DAY!!
	</section>
	<section id='message'>
		Write your message here...
	</section>
</main>
Now spend some time, to write a little message.
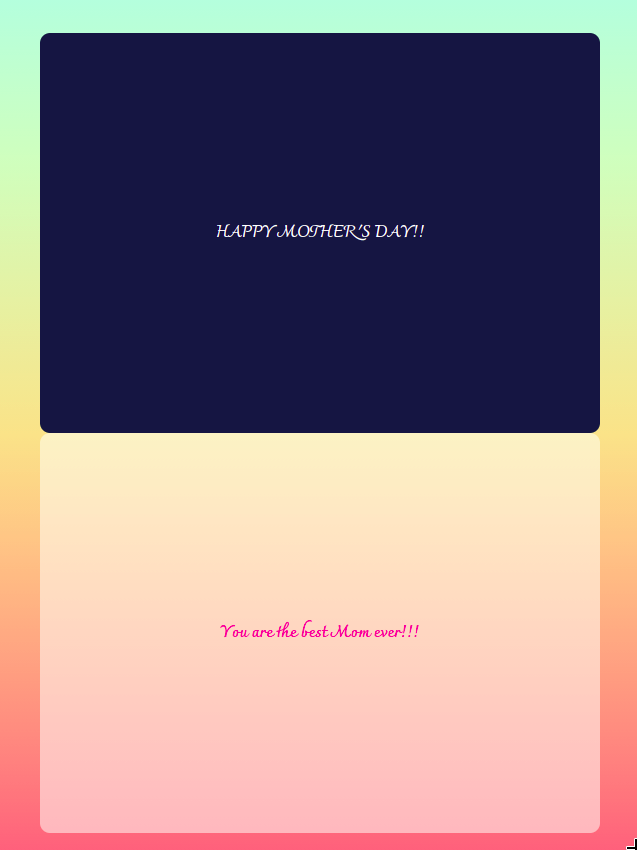
When you are done, your card should look something like this:
Now lets start to make this look like a card using CSS.
2. Choosing the font (**CSS**)
Where HTML is a language to describe what goes on a website, CSS is a language that describes how it should look like.
Basic CSS terms:
SELECTOR: When you tell the computer how you want something to look like, you will need to tell it what that something is. That is what a SELECTOR is. For example if you want to change what our cover looks like you would create a SELECTOR like this in your CSS file:
#cover { }. The{ }is where you put the instructions to tell the browser how you want something to look like. The#coverparts, tells the browser to find an HTML element with the attribute:id='cover'.
PROPERTY: A property is a name of a style that you want to change. For example:
color,font, etc. Here is a list of property names you can use to style.
VALUE: A value is what you want the style to be for a certain property. You use PROPERTY and VALUE like so:
color: red;. This will tell the browser to make the text color red.
Now let's use this knowledege to choose our font for our website
Choosing a custom font:
- Go to: https://fonts.google.com
- Select a font
- Click 'Select a Style'
- Copy the
<link>element and put it in the<head>element - Copy the
font-familyproperty and value and paste in thestyles.cssfile:
#card {
	font-family: 'Charmonman', cursive;
}
Now let's make our card look like a card.
3. Shaping our Card (**CSS**)
First we need to put the card where we want it on the page. The most obvious place is in the middle. To do this we need to first select the <body> element and use CSS to tell the browser how we want to position our card that is inside that element.
body {
	/* REMOVES ANY WHITESPACE AROUND THE EDGE */
	margin: 0;

	/* 100% THE WIDTH OF THE PAGE */
	width:100vw;

	/* 100% THE HEIGHT OF THE PAGE */
	height:100vh;

	/* ALLOWS US TO USE THE FLEX BOX SYSTEM TO POSITION OUR CARD */
	display:flex;

	/* PUTS ALL THE ELEMENTS IN THE BODY IN A COLUMN */
	flex-direction: column;

	/* PUTS THS CARD VERTICALLY IN THE CENTER */
	align-items:center;

	/* PUTS THS CARD HORIZONTALLY IN THE CENTER */
	justify-content:center;

	/* ADDS A GRADIENT BACKGROUND */
	background: linear-gradient(to top, #f7797d, #FBD786, #C6FFDD);
}
In this example we also added a background gradient. To make your own you can go here: https://cssgradient.io/gradient-backgrounds
Now spend sometime, changing the color and position of your card. Feel free to use Dev Tools to experiment. To use Dev Tools, just right click on the page and change the styles using the editor that pops up.
Next we can add styles to our cover and message <section> elements to make our card look like a card.
#card {

	/* APPLIES THIS FONT TO ALL PARTS OF OUR CARD */
	font-family: 'Charmonman', cursive;

}

section {

	/* MAKES ALL PARTS OF THE CARD THIS WIDTH */
	width: 560px;

	/* MAKES ALL PARTS OF THE CARD THIS HEIGHT */
	height: 400px;

	/* ROUNDS THE CORNERS OF OUR CARD PARTS */
	border-radius: 10px;

}

#cover {

	/* COLORS THE BACKGROUND AND TEXT */
	background-color: #0f2342;
	color: #ffffff;

	/* CENTERS TEXT IN MIDDLE */
	display: flex;
	flex-direction: column;
	justify-content: center;
	align-items: center;

}

#message {

	/* COLORS THE BACKGROUND AND TEXT */
	background-color: rgba(255,255,255,0.5);
	color: #e43397;

	/* CENTERS TEXT IN MIDDLE */
	display: flex;
	flex-direction: column;
	align-items: center;
	justify-content: center;

}
Here is what my card looks like so far:
Now spend sometime making the card look like what you want
We should also now see what things look like on our phones. That way our mom can open the card up there. To do this:
- Click the
QRcode button- Aim your phone's camer to the
QRcode- You card should now be visible in the phone's browser.
I had to adjust the <meta name="viewport"> tag so that the initial-scale is 0.65 instead of 1 :
<meta name="viewport" content="width=device-width, initial-scale=0.65">
This instruction tells the browser how to scale the pixel size relative to the device's width. It is useful to make things look good on high resolution small screens.
4. Adding Details (**HTML** and **CSS**)
Spend sometime now uploading the images you want to add to the card and it's background.
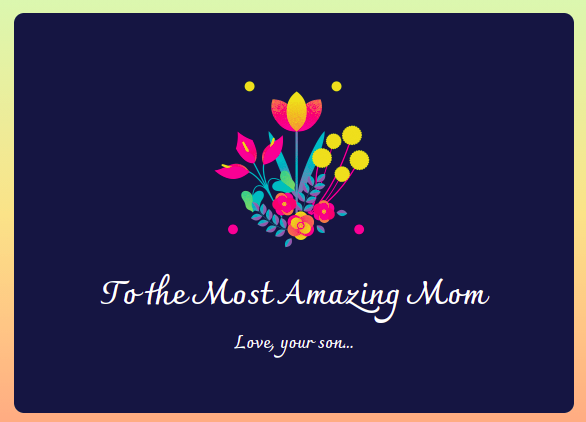
First lets start adding the details to the cover. For me, I added the following new elements in the HTML:
<section id='cover'>
	<img src="flowers.png">
	<h1>To the Most Amazing Mom</h1>
	<h2>Love, your son...</h2>
</section>
Then I styled those details like so:
#cover img {
	height: 50%;
}

#cover h1 {
	font-size:32px;
	margin:0px;
}

#cover h2 {
	font-size:18px;
	margin:0px;
}
Next I added the followign details to the message. Here is the HTML:
<section id='message'>
	<h1>Happy Mother's Day!</h1>
	<img src="https://media.giphy.com/media/ixCowrUCFrfXOXBK7e/giphy.gif">
	<h1>with love, ME!</h1>
</section>
Then styled them like so:
#message h1 {
	margin: 0;
}

#message img {
	height: 60%;
}
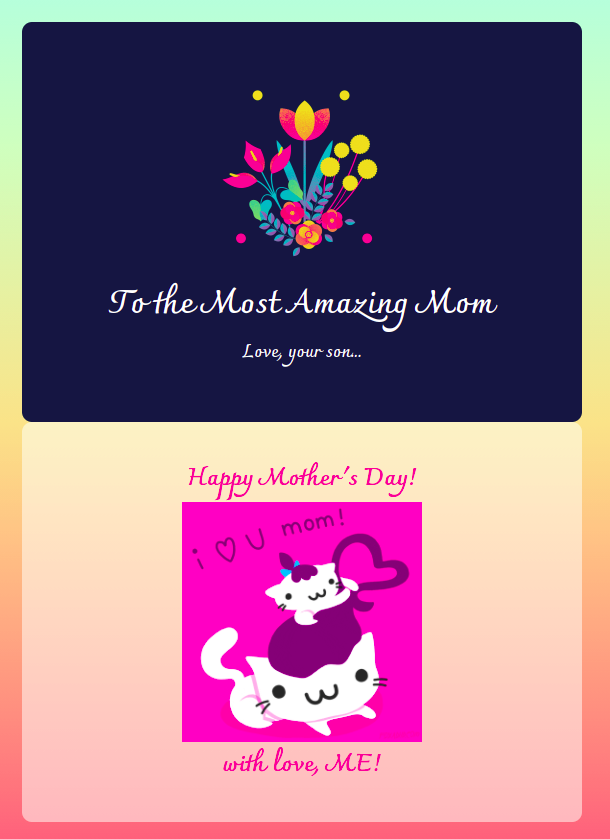
Now my card looks like this:
Finally we need to put the cover over the message so that we can have our Moms open the card up.
To do this we need to first tell the browser where to put our cover. We do this by adding the following style property/value to the #card { } selector:
/* SETS THE ORIGIN TO POSITION THINGS RELATIVE TO */
position:relative;
Then we need to do add where we are going to put our cover relative to this origin. We do this by adding the following to our #cover { } selector:
/* POSITIONS OUR ELEMENT TO BE AT THE TOP LEFT CORNER OF OUR CARD */
position:absolute;
top:0;
left:0;
z-index:1;
So now our card looks like:
5. Adding interactivity (**JS**)
Now we got to have a way to open our card. Well the easiest way to do this is add an onclick attribute to the <section id='cover'> tag, like so:
<section id="cover" onclick='openUp()'>
We also need to update the script tag to not be a module, by removing type="module":
<script src='script.js'></script>
If it is a module, we wont be able to use any of its functions in the HTML.
Next we need to define the openUp function in our script.js file like so:
function openUp() {
	// Puts our <section id='cover'> element in a variable
	const $opencover = document.querySelector('#cover');

	// Adds a `class` attribute with value `animate` to our cover element
	$opencover.classList.add('animate');

	// OUTPUT:
	// <section id='cover' class='animate'>
}
6. Opening the card (**CSS**)
Now we have a class='animate' attribute to trigger a CSS animation. We will create an animation that will open our card:
#cover.animate {
	/* TELLS THE BROWSER TO OPEN THE CARD AROUND THE X AXIS */
	transform: rotateX(180deg);

	/* TELLS THE BROWSER TO OPEN THE CARD FROM THE TOP */
	transform-origin: 0% 0%;

	/* TELLS THE BROWSER TO TAKE 2 SECONDS TO OPEN THE CARD */
	transition: transform 2s;
}

#cover.animate > * {
	/* TELLS THE BROWSER TO MAKE ALL THE CONTENTS OF THE COVER HIDDEN */
	opacity: 0;

	/* TELLS THE BROWSER TO TAKE 1 SECOND TO HIDE THE CONTENTS */
	transition: opacity 1s;
}
7. Further customizations (**CSS/HTML**)
- Add
perspectiveto the card's cover when opening up. This makes the card look like it is opening up towards you in 3d space. Add the following to the#card {}css selector:
#card {
	perspective: 3000px;
}
- Add a
background imageto the body using CSS:
body {
	background-image: url("background.jpg");
	background-size: cover;
	background-position: center center;
}
- Add a
box shadowto the card
section {
	box-shadow: 0 19px 38px rgba(0,0,0,0.30), 0 15px 12px rgba(0,0,0,0.22);
}
- Add a
blureffect to the message You need to have background image to see the true effect.
#message {
	background-color: rgba(255,255,255,0.5);
	backdrop-filter: blur(8px);
}
- Make the card twitch when you hover over it and its not animating
#cover:not(.animate):hover {
	transform: rotateX(15deg);
	transform-origin: 0% 0%;
	transition: transform 0.5s;
	cursor:grab;
}
- Browser Tab
The browser tab is the first visual thing we can define in our HTML file:

To create this, in the <head> element define the following:
<link rel="shortcut icon" type="image/png" href="favicon.png"/>
<title>You've got a card</title>
We put this in the <head> element, because that is the box we put instructions for the browser to do things outside of the main viewing area.
Now you may notice that there is no 💌 image. That is because you will need to upload it. Pick any image you like from the web, and just name it favicon.png:
- Click the
Uploadbutton in the upper right hand corner of this page- Upload an image
- Click the
⋮next to the image name and selectrenameto change the name tofavicon.png.- Change the file extension from
pngif you need to.
Feel free to change the text in the <title> element as well!
- Close the card
Now you may like to have a way to close our card. Well the easiest way to do this is add an onclick attribute to the <section id='message'> tag, like so:
<section id="message" onclick='closeDown()'>
Next we need to define the closeDown function in our script.js file like so:
function closeDown() {
	// Puts our <section id='cover'> element in a variable
	const $opencover = document.querySelector('#cover');

	// Remove a `class` attribute with value `animate` to our cover element
	$opencover.classList.remove('animate');

	// OUTPUT:
	// <section id='cover'>
}
8. Challenges
- Add a video using the
<video>element or add one from youtube using an<iframe>. - Add a song using the
<audio>element - Add a custom cursor
Join Qoom Discord to find solutions for the challenges