Memory Tester
Introduction
Goals:
- Learn how to build a game from scratch using Qoom
- Provide a starter project you can use to explore your own gaming ideas
Technologies you will Learn:
CSSVariables and TransitionsJavascriptto create the game constraints, loop, and collision physics
Strategy
Video List
You can find tutorial videos here
Need Help?
Get help from the Qoom team and our community members. Join Qoom Community
1. Creating Game Elements in HTML
To start create a New Project on your coding space and open up the index.html file so that we can start coding.
Here are our game elements:
<body>
<!-- Our Intro Screen -->
<div id='intro'>
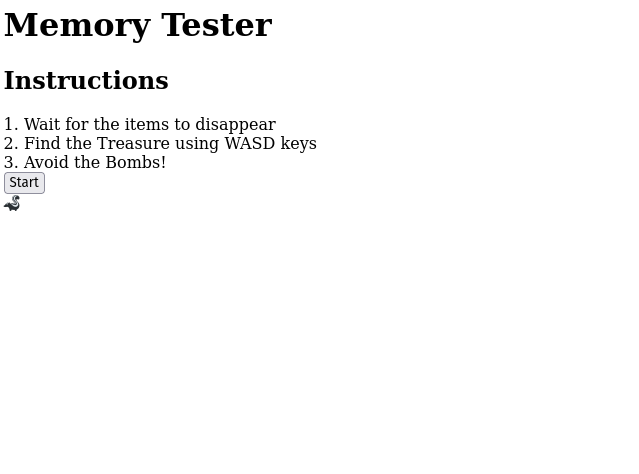
<h1>Memory Tester</h1>
<h2>Instructions</h2>
<div>1. Wait for the items to disappear</div>
<div>2. Find the Treasure using WASD keys</div>
<div>3. Avoid the Bombs!</div>
<button id='start'>Start</button>
</div>
<!-- Our Game Board -->
<div id='board'>
<div id='player'>
🦨
</div>
</div>
</body>
Make sure your head element has the following:
<head>
	<title>Memory Tester</title>
	<meta name='viewport' content='width=device-width, initial-scale=1'>
	<link rel="stylesheet" href="styles.css">
	<script type="module" src="script.js"></script>
</head>
When done, you should see the basic structure of our elements:
2. Styling Game Elements
Now that we have our elements, let's style them to make our game look playable.
First let's style our body element to create a dark theme:
body {
	background-color:black;
	color: white;
	width:100vw;
	height:100vh;
	margin:0;
	overflow:hidden;
	display:flex;
	flex-direction:column;
	align-items:center;
	justify-content:center;
}
Then let's import a font from https://fonts.google.com:
@import url('https://fonts.googleapis.com/css2?family=Ruslan+Display&display=swap');

* {
	font-family: 'Ruslan Display', cursive;
}
Now let's style the Intro Modal:
#intro {
	border:solid 1px green;
	padding:20px;
	border-radius:20px;
	display:flex;
	flex-direction:column;
	align-items:center;
	justify-content:center;
	gap:20px;
}
Then to make stand on it's own, let's hide the gameboard by adding a class name of hide:
<div id='board' class='hide'>
	<div id='player'>
		🦨
	</div>
</div>
And defining the hide class in CSS:
.hide {
	display:none !important;
}
Next let's create some variables that will be used to dictate the size of our game board and character:
:root {
	--board-size: 95vmin;
	--char-size: calc(var(--board-size) / 25)
}
We can then use these variables when styling or gameboard and character. We use position so that we can put our character any where we want inside of our board. We usen vmin so that the game will have the same aspect ratio, regardless of what screen you are using.
#board {
	background: white;
	width: var(--board-size);
	height: var(--board-size);
	position:relative;
}

#player {
	position:absolute;
	top: 20vmin;
	left: 34vmin;
	font-size: var(--char-size);
}
Note: You can use the hide class to temporarily hide the modal and show the board inorder to style it
When done your page will look like this:

3. Game Initalization
So to initialize our game we will go to our script.js file and write the following code:
- Constants to hold the html elements that we wish to use in our game
- Variables to describe the starting state of our game
- A function to show the board and hide the intro
- Bind that function to that start button's click event
/* GAME ELEMENTS */
const $intro = document.getElementById('intro');
const $start = document.getElementById('start');
const $board = document.getElementById('board');
const $player = document.getElementById('player');

const treasure = '🪙';
const bomb = '💣';


/* GAME VARIABLES */
let velocity = { x: 0, y: 0 }
let level = 0;


function init() {
	$intro.classList.add('hide');
	$board.classList.remove('hide');
}

$start.addEventListener('click', init);
4. Moving the Character
Now to move the character we need to do the following:
A. Create a function to change the velocity based on what key they pressed
/* GAME VARIABLES */
let velocity = { x: 0, y: 0 }
let level = 0;
let levels = [
	{ speed: 1 }	// Speed has units of vmin
]


function push(e) {
	const speed = levels[level].speed
	switch(e.key) {
		case 'W':
		case 'w':
		case 'ArrowUp':
			velocity.y = -speed;
			break;
		case 'A':
		case 'a':
		case 'ArrowLeft':
			velocity.x = -speed;
			break;
		case 'S':
		case 's':
		case 'ArrowDown':
			velocity.y = speed;
			break;
		case 'D':
		case 'd':
		case 'ArrowRight':
			velocity.x = speed;
			break;
	}
}
B. Create a function to stop the character when no key is pressed:
function stop(e) {
	velocity = { x: 0, y: 0 }
}
C. Add event listeners to the keydown and keyup events
function init() {
	$intro.classList.add('hide');
	$board.classList.remove('hide');

	window.addEventListener('keydown', push);
	window.addEventListener('keyup', stop);
}
D. Create a loop that call code everytime the browser is ready to draw a new frame
function init() {
	$intro.classList.add('hide');
	$board.classList.remove('hide');

	window.addEventListener('keydown', push);
	window.addEventListener('keyup', stop);

	window.requestAnimationFrame(loop)
}

function loop() {
	// This calls the function again when the browser can draw the next frame
	window.requestAnimationFrame(loop)
}
E. Grab all the pixel location of all the game elements
function loop() {
	const playerStyle = window.getComputedStyle($player);
	const playerBox = $player.getBoundingClientRect();
	const boardBox = $board.getBoundingClientRect();
	const bodyBox = document.body.getBoundingClientRect();
}
F. Move and Draw our character in vmin units
function move(playerStyle, playerBox, boardBox, min) {
	let x = parseFloat(playerStyle.left);
	let y = parseFloat(playerStyle.top);

	let maxx = (boardBox.width - playerBox.width);
	let maxy = (boardBox.height - playerBox.height);

	x += velocity.x*min/100;
	y += velocity.y*min/100;

	x = Math.min(Math.max(x, 0), maxx);
	y = Math.min(Math.max(y, 0), maxy);

	return { x, y }
}

function draw(x, y, min) {
	$player.style.left = x/min*100 + 'vmin';
	$player.style.top = y/min*100 + 'vmin';
}

function loop() {
	const playerStyle = window.getComputedStyle($player);
	const playerBox = $player.getBoundingClientRect();
	const boardBox = $board.getBoundingClientRect();
	const bodyBox = document.body.getBoundingClientRect();

	const min = Math.min(bodyBox.width, bodyBox.height);
	const { x, y } = move(playerStyle, playerBox, boardBox, min);
	draw(x, y, min)

	window.requestAnimationFrame(loop)
}
5. Adding the Treasure
To add the treasure we need to do the following:
A. Create a new Game Element to hold our treasure
/* GAME ELEMENTS */
const $intro = document.getElementById('intro');
const $start = document.getElementById('start');
const $board = document.getElementById('board');
const $player = document.getElementById('player');

const treasure = '🪙';
const bomb = '💣';

let $reward;
B. Create a function to randomly put our treasure onto our board
function getRandomPos(maxx,maxy) {
	let left = Math.random()*maxx;
	let top = Math.random()*maxy;
	return { left, top }
}

function setupBoard() {
	const playerStyle = window.getComputedStyle($player);
	const playerBox = $player.getBoundingClientRect();
	const boardBox = $board.getBoundingClientRect();
	const bodyBox = document.body.getBoundingClientRect();
	const min = Math.min(bodyBox.width, bodyBox.height);

	let maxx = (boardBox.width - playerBox.width);
	let maxy = (boardBox.height - playerBox.height);

	$reward = document.createElement('div');
	$reward.id = 'item';
	$reward.innerHTML = treasure;

	var rewardPos = getRandomPos(maxx,maxy);
	$reward.style.left = rewardPos.left/min*100 + 'vmin';
	$reward.style.top = rewardPos.top/min*100 + 'vmin';
	$board.appendChild($reward);
}
C. On init call that function
function init() {
	$intro.classList.add('hide');
	$board.classList.remove('hide');

	window.addEventListener('keydown', push);
	window.addEventListener('keyup', stop);

	setupBoard();

	window.requestAnimationFrame(loop)
}
Now if you play your game, you should see a treasure randomly appear
6. Adding the Bombs
Adding Obstacles is just like adding a treasure, but this time we are going to create multiple of them like so:
A. Create a new Game Element to hold our obstacles
let $reward;
let obstacles = [];
B. Randomly generating our obstacles
function setupBoard() {
	const playerStyle = window.getComputedStyle($player);
	const playerBox = $player.getBoundingClientRect();
	const boardBox = $board.getBoundingClientRect();
	const bodyBox = document.body.getBoundingClientRect();
	const min = Math.min(bodyBox.width, bodyBox.height);

	let maxx = (boardBox.width - playerBox.width);
	let maxy = (boardBox.height - playerBox.height);

	// Create the Reward
	$reward = document.createElement('div');
	$reward.id = 'item';
	$reward.innerHTML = treasure;

	let rewardPos = getRandomPos(maxx,maxy);
	$reward.style.left = rewardPos.left/min*100 + 'vmin';
	$reward.style.top = rewardPos.top/min*100 + 'vmin';
	$board.appendChild($reward);

	// Create our obstacles
	const count = levels[level].obstacleCount;
	while(obstacles.length < count) {
		var $obstacle = document.createElement('div');
		$obstacle.classList.add('obstacle');
		$obstacle.innerHTML = bomb;

		var obstaclePos = getRandomPos(maxx,maxy);
		$obstacle.style.left = obstaclePos.left/min*100 + 'vmin';
		$obstacle.style.top = obstaclePos.top/min*100 + 'vmin';
		$board.appendChild($obstacle);
		obstacles.push($obstacle)
	}

}
7. Collision Detection
In order for us to build a board that doesn't have any overlapping bombs with characters and such, we need to detect if there is a collision or not. Here is a function we will use:
function collides(box1, box2) {
	if(!box1) return false;
	if(!box2) return false;
	if(box1.right < box2.left) return false;
	if(box1.left > box2.right) return false;
	if(box1.top > box2.bottom) return false;
	if(box1.bottom < box2.top) return false;
	return true;
}
To check if our board is good we need to create a list of items to check. Let's update the function below to use this list to check our board for collisions and then recreate the board if there are some:
function setupBoard() {
	const playerStyle = window.getComputedStyle($player);
	const playerBox = $player.getBoundingClientRect();
	const boardBox = $board.getBoundingClientRect();
	const bodyBox = document.body.getBoundingClientRect();
	const min = Math.min(bodyBox.width, bodyBox.height);

	let maxx = (boardBox.width - playerBox.width);
	let maxy = (boardBox.height - playerBox.height);
	let items = [];
	items.push(playerBox)

	// Create the Reward
	$reward = document.createElement('div');
	$reward.id = 'item';
	$reward.innerHTML = treasure;

	let rewardPos = getRandomPos(maxx,maxy);
	$reward.style.left = rewardPos.left/min*100 + 'vmin';
	$reward.style.top = rewardPos.top/min*100 + 'vmin';
	$board.appendChild($reward);
	items.push($reward.getBoundingClientRect())

	// Create our obstacles
	const count = levels[level].obstacleCount;
	while(obstacles.length < count) {
		var $obstacle = document.createElement('div');
		$obstacle.classList.add('obstacle');
		$obstacle.innerHTML = bomb;

		var obstaclePos = getRandomPos(maxx,maxy);
		$obstacle.style.left = obstaclePos.left/min*100 + 'vmin';
		$obstacle.style.top = obstaclePos.top/min*100 + 'vmin';
		$board.appendChild($obstacle);
		obstacles.push($obstacle)
		items.push($obstacle.getBoundingClientRect())
	}

	if(checkBoard(items)) {
		return;
	} else {
		cleanBoard();
		setupBoard();
	}

}
Then we just need to create checkBoard and cleanBoard as such:
function checkBoard(items) {
	let currentItem;
	let otherItems;
	for(var i = 0; i < items.length; i++) {
		currentItem = items[i];
		otherItems = items.filter((x, j) => i !== j);
		if(otherItems.some(item => collides(item, currentItem)))
			return false;
	}
	return true;
}

function cleanBoard() {
	obstacles.forEach($obstacle => $board.removeChild($obstacle));
	$board.removeChild($reward);
	$reward = undefined;
	obstacles = [];

	stop();
}
Now if you look at your game, you will see nothing will be overlapping
8. Ending the Game
Now to end the game, we need to use our collision detection function everytime we call loop, that we can see if we moved into an obstacle. Then we need to handle what we do when we collide:
function loop() {
	const playerStyle = window.getComputedStyle($player);
	const playerBox = $player.getBoundingClientRect();
	const boardBox = $board.getBoundingClientRect();
	const bodyBox = document.body.getBoundingClientRect();
	const rewardBox = $reward.getBoundingClientRect();
	const obstacleBoxes = obstacles.map($obstacle => $obstacle.getBoundingClientRect())


	const min = Math.min(bodyBox.width, bodyBox.height);
	const { x, y } = move(playerStyle, playerBox, boardBox, min);
	draw(x, y, min);

	const result = checkCollisions(playerBox, rewardBox, obstacleBoxes);

	switch(result) {
		case 'reward':
			handleSuccess();
			break;
		case 'bomb':
			handleFailure();
			break;
		default:
			// We only want to go to the next frame if there was no collisions
			window.requestAnimationFrame(loop)
	}

}
Here is what those new functions look like
function checkCollisions(playerBox, rewardBox, obstacleBoxes) {
	if(collides(playerBox, rewardBox)) {
		return 'reward';
	}

	if(obstacleBoxes.some(box => collides(playerBox, box))) {
		return 'bomb';
	}

	return;
}

function handleSuccess() {
	level++;
	if(!levels[level]) return showGameOver('You Won!!!!');

	alert(`SUCCESS. YOU ARE ON LEVEL ${level + 1}`);
	cleanBoard();
	setupBoard();

}

function handleFailure() {
	showGameOver('You Lost :(');
}

function showGameOver(message) {
	alert(message);
	location.reload();
}
9. Hiding the Elements
Finally we need to allow the character to move only after all the items are hidden.
A. Let's remove the window.requestAnimationFrame(loop) from our init function
function init() {
	$intro.classList.add('hide');
	$board.classList.remove('hide');

	window.addEventListener('keydown', push);
	window.addEventListener('keyup', stop);

	setupBoard();

}
B. And then place it inside of setupBoard:
function setupBoard() {
	const playerStyle = window.getComputedStyle($player);
	const playerBox = $player.getBoundingClientRect();
	const boardBox = $board.getBoundingClientRect();
	const bodyBox = document.body.getBoundingClientRect();
	const min = Math.min(bodyBox.width, bodyBox.height);

	let maxx = (boardBox.width - playerBox.width);
	let maxy = (boardBox.height - playerBox.height);
	let items = [];
	items.push(playerBox)

	// Create the Reward
	$reward = document.createElement('div');
	$reward.id = 'item';
	$reward.innerHTML = treasure;

	let rewardPos = getRandomPos(maxx,maxy);
	$reward.style.left = rewardPos.left/min*100 + 'vmin';
	$reward.style.top = rewardPos.top/min*100 + 'vmin';
	$board.appendChild($reward);
	items.push($reward.getBoundingClientRect())

	// Create our obstacles
	const count = levels[level].obstacleCount;
	while(obstacles.length < count) {
		var $obstacle = document.createElement('div');
		$obstacle.classList.add('obstacle');
		$obstacle.innerHTML = bomb;

		var obstaclePos = getRandomPos(maxx,maxy);
		$obstacle.style.left = obstaclePos.left/min*100 + 'vmin';
		$obstacle.style.top = obstaclePos.top/min*100 + 'vmin';
		$board.appendChild($obstacle);
		obstacles.push($obstacle)
		items.push($obstacle.getBoundingClientRect())
	}

	if(checkBoard(items)) {
		setTimeout(function() {
			$reward.classList.add('hidden');
			obstacles.forEach($obstacle => $obstacle.classList.add('hidden'))
			window.requestAnimationFrame(loop)
		}, levels[level].time)

		return;
	} else {
		cleanBoard();
		setupBoard();
	}

}
Notice how we use setTimeout to hide the elements after a given time. We added the time to our levels object.
And also let's add a few more levels to make our game more interesting:
let levels = [
	{ obstacleCount: 1, time: 2000, speed: 0.5 },
	{ obstacleCount: 25, time: 1000, speed: 0.25 },
	{ obstacleCount: 30, time: 500, speed: 0.25 },
	{ obstacleCount: 35, time: 500, speed: 0.25 },
	{ obstacleCount: 35, time: 500, speed: 0.15 }
]
We now need to update our styles.css to define what hidden means. We will add a transition to slowly fade our items away:
#player, #item, .obstacle {
	position:absolute;
	top: 20vmin;
	left: 34vmin;
	font-size: var(--char-size);

	/* Adding a start opacity to transition from */
	opacity: 1;
}


.hidden {
	opacity: 0 !important;
	transition: opacity 0.5s;
}
Challenges
- Show an
explosionwhen hitting a bomb. Easiest thing to do is show an animated gif- Make the game harder or easier by changing the
levels- Use a
sprite sheetto show the player moving- Add another item that follows you
- Add a timer that if goes to zero, you lose the game
- Allow the user to be hit by multiple bombs
- Build a better game board that does not require recursion to do collision checks