Google Teachable Machine:
Rock Paper Scissors
Introduction
Goals:
- Train an AI Model with Google Teachable Machine
- Use Tensorflow JS to determine your choice using the AI model
- Use Javascript to build a Rock Paper Scissors game
Technologies you will Learn:
- Importing an
AI Modelto build a serverless web app. - Learn how to use CSS to make a
Centered Layout Hide and Showelements using CSS and Javascript- Use
Math.randomto randomly choose the computer's move - Use the
Web Camerato interact with your app.
Strategy
Video List
You can find tutorial videos here
Need Help?
Get help from the Qoom team and our community members. Join Qoom Community
1. Model training on Google Teachable Machine
Let's get started. The first thing we need to do is to build a model that we can use to translate a hand gesture into one of three words: Rock, Paper, or Scissors. In this instance, you can think of the model as a set of instructions to tell our computer how to reduce an image, which is just a set of numbers representing the color of a pixel, into three numbers. Each number represents the probability that the image contains Rock, Paper, or Scissors. These instructions are created using algorithms built into the Tensorflow JS library, which uses various principals described in the field of Machine Learning.
To build our model let's go to Google Teachable Machine and:
- Click
Get Started. - Click
Image Project - Click
Standard Image Model
When done you should see a screen like:
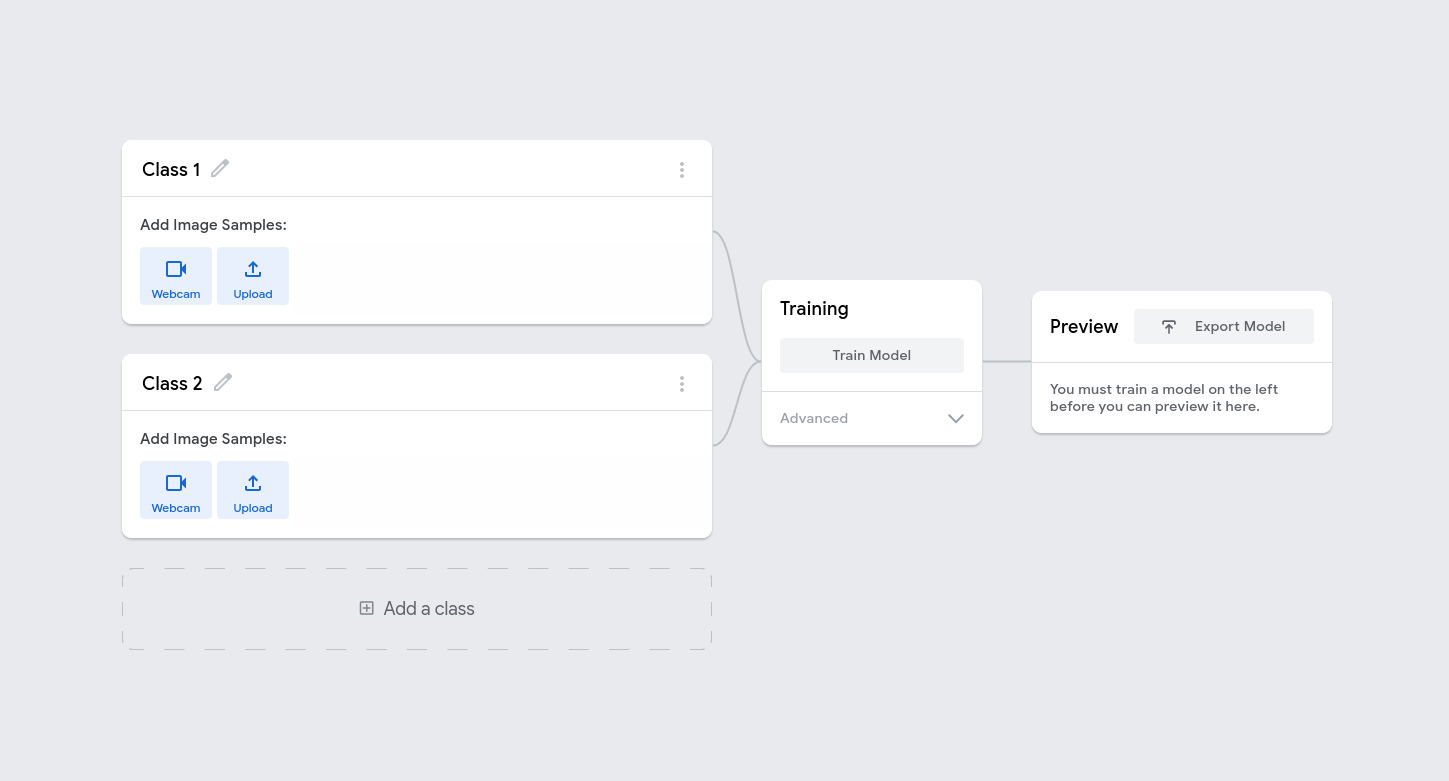
Next let's define 3 Classes, one for Rock, Paper and Scissors:
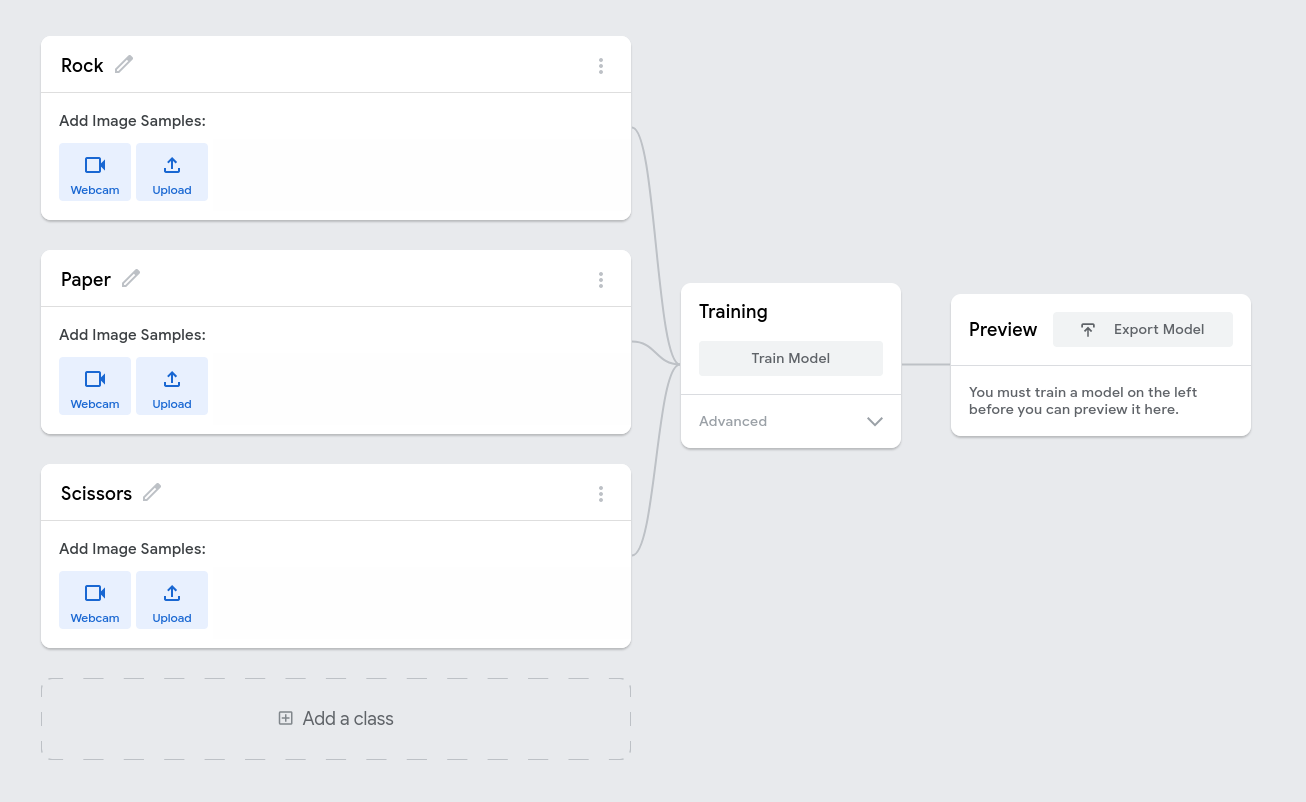
Then add at least 100 pictures for each class, using the webcam model. Make sure to move your hand around to get lots of different samples:
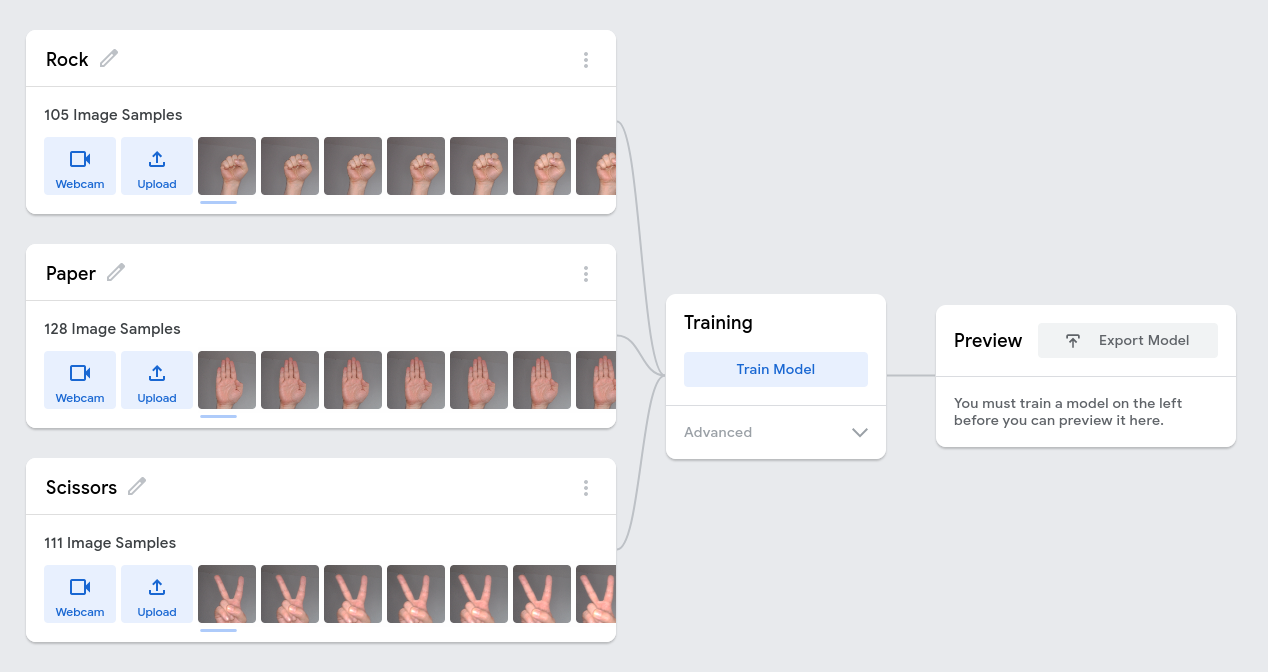
Then click Train Model and wait a few minutes.
Finally, click Export Model. Feel free to test your model and retrain if need be. Then click Tensorflow.js tab, click Download, and then Download my model. This will save your model in a zip file.

When done, do not close the window. We will need to code in the next section.
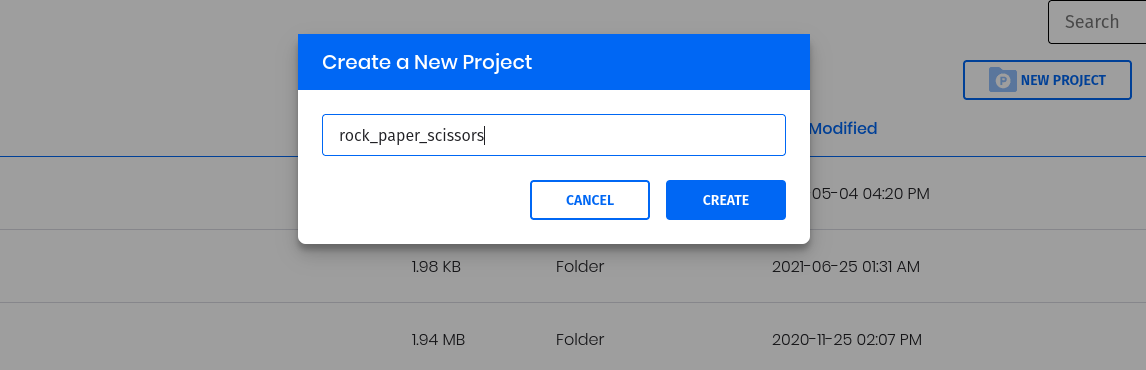
2. Creating a new project on Qoom
Next let's create a new project on Qoom. If you have not already, create an free account on Qoom. Once you have an account, you will be sent to your Coding Space. From there, click the New Project folder and create a project called rock_paper_scissors.
Once the project is created, you will sent to the editor. Next copy the code from Google Teachable Machine's export screen from the previous step and paste inside the <body></body> element shown in the editor, like such:
<body>
	<div>Teachable Machine Image Model</div>
	<button type="button" onclick="init()">Start</button>
	<div id="webcam-container"></div>
	<div id="label-container"></div>
	<script src="https://cdn.jsdelivr.net/npm/@tensorflow/tfjs@1.3.1/dist/tf.min.js"></script>
	<script src="https://cdn.jsdelivr.net/npm/@teachablemachine/image@0.8/dist/teachablemachine-image.min.js"></script>
	<script type="text/javascript">
	    // More API functions here:
	    // https://github.com/googlecreativelab/teachablemachine-community/tree/master/libraries/image

	    // the link to your model provided by Teachable Machine export panel
	    const URL = "./my_model/";

	    let model, webcam, labelContainer, maxPredictions;

	    // Load the image model and setup the webcam
	    async function init() {
	        const modelURL = URL + "model.json";
	        const metadataURL = URL + "metadata.json";

	        // load the model and metadata
	        // Refer to tmImage.loadFromFiles() in the API to support files from a file picker
	        // or files from your local hard drive
	        // Note: the pose library adds "tmImage" object to your window (window.tmImage)
	        model = await tmImage.load(modelURL, metadataURL);
	        maxPredictions = model.getTotalClasses();

	        // Convenience function to setup a webcam
	        const flip = true; // whether to flip the webcam
	        webcam = new tmImage.Webcam(200, 200, flip); // width, height, flip
	        await webcam.setup(); // request access to the webcam
	        await webcam.play();
	        window.requestAnimationFrame(loop);

	        // append elements to the DOM
	        document.getElementById("webcam-container").appendChild(webcam.canvas);
	        labelContainer = document.getElementById("label-container");
	        for (let i = 0; i < maxPredictions; i++) { // and class labels
	            labelContainer.appendChild(document.createElement("div"));
	        }
	    }

	    async function loop() {
	        webcam.update(); // update the webcam frame
	        await predict();
	        window.requestAnimationFrame(loop);
	    }

	    // run the webcam image through the image model
	    async function predict() {
	        // predict can take in an image, video or canvas html element
	        const prediction = await model.predict(webcam.canvas);
	        for (let i = 0; i < maxPredictions; i++) {
	            const classPrediction =
	                prediction[i].className + ": " + prediction[i].probability.toFixed(2);
	            labelContainer.childNodes[i].innerHTML = classPrediction;
	        }
	    }
	</script>
</body>
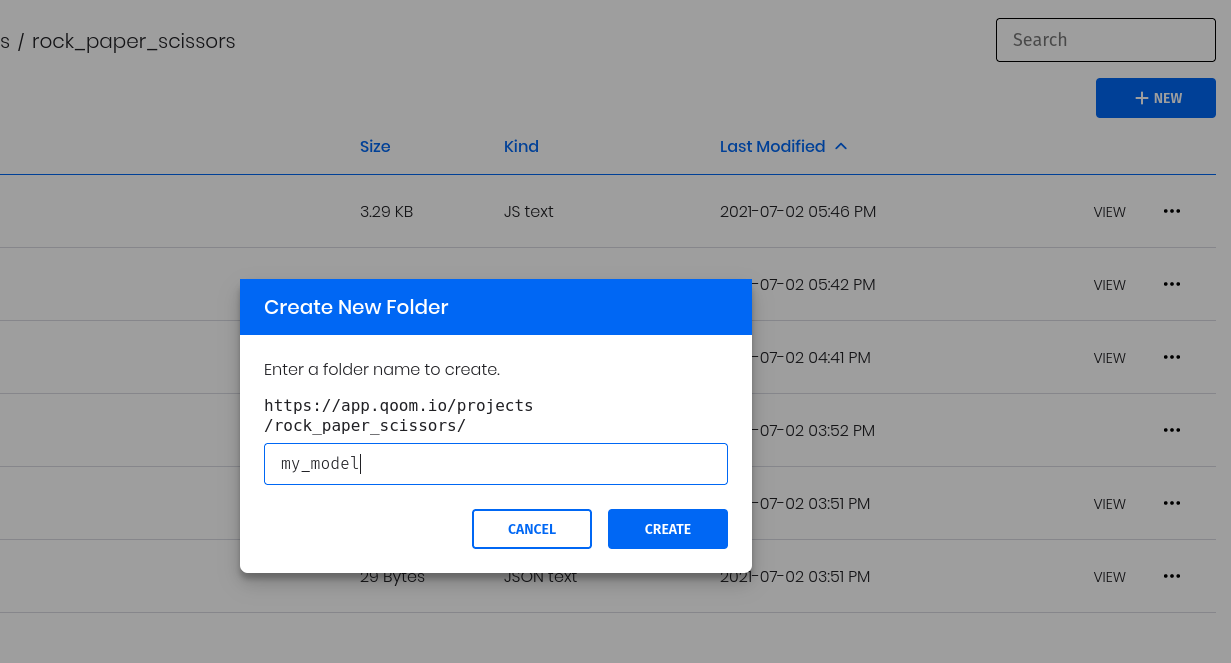
Reading the code, there is a variable called URL that contains a path ./my_model/. This is telling us we need to upload the files we downloaded earlier into a folder called my_model. To do this, go back the coding space explorer and click + New -> New Folder. Make sure you are inside your project folder.
Finally drag the three files you downloaded and extracted into this folder:

Once done, you can go back to your index.html page in the editor. Then in the preview panel click the start button and test out your model.
We are done with Google Teachable Machine now. You can close that tab if you'd like.
3. Build the game layout using HTML
Alright, now that we have a working app that uses our model, we can now transform it into Rock Paper Scissors. We will do that by first changing the index.html file:
- Move the contents of the
<script></script>into script.js:
// More API functions here:
// https://github.com/googlecreativelab/teachablemachine-community/tree/master/libraries/image

// the link to your model provided by Teachable Machine export panel
const URL = "./my_model/";

let model, webcam, labelContainer, maxPredictions;

// Load the image model and setup the webcam
async function init() {
    const modelURL = URL + "model.json";
    const metadataURL = URL + "metadata.json";

    // load the model and metadata
    // Refer to tmImage.loadFromFiles() in the API to support files from a file picker
    // or files from your local hard drive
    // Note: the pose library adds "tmImage" object to your window (window.tmImage)
    model = await tmImage.load(modelURL, metadataURL);
    maxPredictions = model.getTotalClasses();

    // Convenience function to setup a webcam
    const flip = true; // whether to flip the webcam
    webcam = new tmImage.Webcam(200, 200, flip); // width, height, flip
    await webcam.setup(); // request access to the webcam
    await webcam.play();
    window.requestAnimationFrame(loop);

    // append elements to the DOM
    document.getElementById("webcam-container").appendChild(webcam.canvas);
    labelContainer = document.getElementById("label-container");
    for (let i = 0; i < maxPredictions; i++) { // and class labels
        labelContainer.appendChild(document.createElement("div"));
    }
}

async function loop() {
    webcam.update(); // update the webcam frame
    await predict();
    window.requestAnimationFrame(loop);
}

// run the webcam image through the image model
async function predict() {
    // predict can take in an image, video or canvas html element
    const prediction = await model.predict(webcam.canvas);
    for (let i = 0; i < maxPredictions; i++) {
        const classPrediction =
            prediction[i].className + ": " + prediction[i].probability.toFixed(2);
        labelContainer.childNodes[i].innerHTML = classPrediction;
    }
}
- Move the
<script src='...'></script>elements that loadtensorflow.jsinto the<head></head>element. This will keep our HTML body element free of any javascript:
<head>
	<link rel="stylesheet" href="styles.css">
	<script type="module" src="script.js"></script>
	<script src="https://cdn.jsdelivr.net/npm/@tensorflow/tfjs@1.3.1/dist/tf.min.js"></script>
	<script src="https://cdn.jsdelivr.net/npm/@teachablemachine/image@0.8/dist/teachablemachine-image.min.js"></script>
</head>
- Next we will modify the code in the
<body>element to have all the elements we need for our game:
<body>

	<h1>Rock 👊 Paper🤚 Scissors✌️<div>using Google Teachable Machine</div></h1>
	<button type="button" onclick="init()">Start</button>
	<div id="game">
		<div>
			<h2>Computer</h2>
			<div id="computer"></div>
		</div>
		<div>
			<h2>You</h2>
			<div id="webcam-container"></div>
		</div>
	</div>
	<div id="label-container"></div>
	<div id="loading">When the video appears, show your webcam your choice. It will take the app a few seconds to analyze.</div>
	<div id="reload">
		<a>Play Again</a>
	</div>


</body>
- Finally we need to make the
init()function global. So at the bottom ofscript.jsadd:
window.init = init;
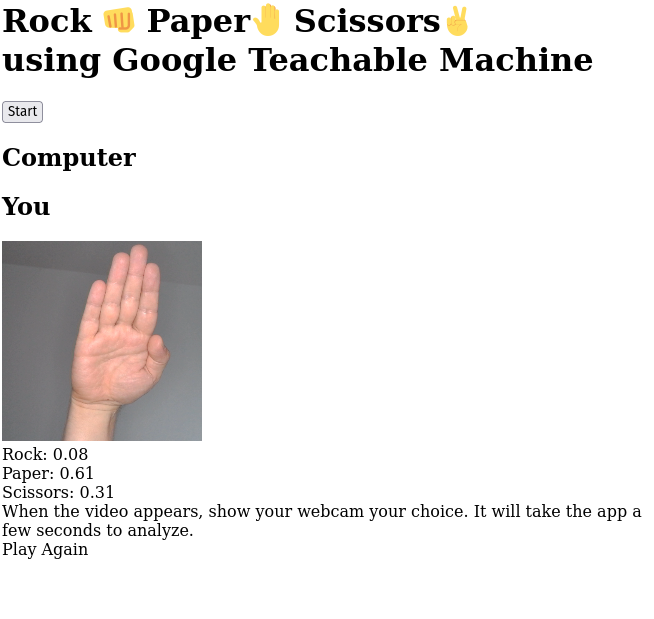
When done you can still test your model, but using our game elements:
4. Centering elements using CSS
Next we will use display:flex to center our elements. Here is the code:
body {
	display:flex;
	flex-direction:column;
	height:100vh;
	width:100vw;
	align-items:center;
	justify-content:center;
	text-align:center;
}

h1 {
	font-size:54px;
}

h1 div {
	font-size:32px;
	font-weight:normal;
}

button {
	background-color:#960000;
	font-size:42px;
	color:white;
	width:200px;
	height:200px;
	border-radius:50%;
	border:none;
}

button:hover {
	background-color:#690000;
	cursor:pointer;
}

#game {
	display:flex;
	align-items:center;
	justify-content:center;
	width:500px;
	height:500px;
	border:solid 1px black;
}

#game > div {
	width:50%;
	height:100%;
	border:solid 1px black;
	display:grid;
	grid-template-rows: 50px auto;
}

#game h2 {
	display:flex;
	align-items:center;
	justify-content:center;
}

#you, #computer {
	border-top:solid 1px black;
	display:flex;
	align-items:center;
	justify-content:center;
	font-size:100px;
}

a {
	color:blue;
	text-decoration:underline;
	cursor:pointer;
}
Notice that all the elements styled with
display:flex;
align-items:center;
justify-content:center;
have their content centered vertically and horizontally.
5. Starting the game
Now we are ready to create the game flow:
- When page loads, only show the first two elements in the body: the header and button
To do this we need to hide everything but those two elements. We do that by adding a hide class to each of those elements. We will also rename webcam-container to you and label-container to results to better represent how we use them.
<body>

	<h1>Rock 👊 Paper🤚 Scissors✌️<div>using Google Teachable Machine</div></h1>
	<button type="button" onclick="init()">Start</button>
	<div id="game" class='hide'>
		<div>
			<h2>Computer</h2>
			<div id="computer"></div>
		</div>
		<div>
			<h2>You</h2>
			<div id="you"></div>
		</div>
	</div>
	<div id="results" class='hide'></div>
	<div id="loading" class='hide'>When the video appears, show your webcam your choice. It will take the app a few seconds to analyze.</div>
	<div id="reload" class='hide'>
		<a>Play Again</a>
	</div>

</body>
Then in the styles.css file add the a style to force hide those elements:
.hide {
	display:none !important;
}
- When the user clicks the button, hide the header and button, and show the loading message
Let's now create a start function in the javascript to do what we want as well make it global:
function start() {
	const h1 = document.querySelector('h1');
	const button = document.querySelector('button');

	const loading = document.querySelector('#loading');

	button.classList.add('hide');
	h1.classList.add('hide');
	loading.classList.remove('hide');

	init();
}
window.start = start;
Since our start function calls init, let's have our button call start instead if init:
<button type="button" onclick="start()">Start</button>
- When the web cam is ready, hide the loading message and show the table and show a message
Rock->Paper->Scissors. Where each word is displayed only for 1 second
To do this we need to do several things. The first part is to create some global variables we can use to keep track of things:
const URL = "./my_model/";

let model, webcam, labelContainer;

// Used to keep track of how many frames in the video that have played
let framecount = 0;

// Making an array of words and emojis to represent rock paper and scissors
const choices = ['ROCK', 'PAPER', 'SCISSORS'];
const emojis = ['👊','🤚', '✌️'];

// Variables that store the total probablity that the web cam has seen rock, paper, or scissors
let rock = 0, paper = 0, scissors = 0;
Then we can hide and show what we want. Let's create a play function to do this:
function play() {

	const game = document.querySelector('#game');
	const loading = document.querySelector('#loading');
	const results = document.querySelector('#results');
	const you = document.querySelector("#you");
	const reload = document.querySelector("#reload");

	reload.classList.add('hide');
	game.classList.remove('hide');
	results.classList.remove('hide');
	loading.classList.add('hide');

	// reseting our variables to zero
	framecount = 0;
	rock = 0;
	paper = 0;
	scissors = 0;

	// This will call the loop function 1/60th of a second later
	window.requestAnimationFrame(loop);
}
Then in the loop function let's add the code to display our words in 1 second intervals:
async function loop() {

	const results = document.querySelector('#results');
	webcam.update();
	framecount++;

	let index;
	if(framecount < 60) {  // First second
		index = 0;
		// display rock
	} else if(framecount < 120) { // Second second
		index = 1;
		// display paper
	} else {					// Third second
		index = 2;
		// display scissors
	}

	await predict();		// Calling the predict function

	if(framecount < 180) {
		window.requestAnimationFrame(loop);		// Call the next frame at 60 frames per second.
		results.innerHTML = `<h1>${choices[index]}${emojis[index]}</h1>`
	} else {
		check(); // Check to see who is the winner
	}

}
Finally we need to link the play button to the init button:
async function init() {
	const modelURL = URL + "model.json";
	const metadataURL = URL + "metadata.json";

	model = await tmImage.load(modelURL, metadataURL);

	const flip = true; // whether to flip the webcam
	webcam = new tmImage.Webcam(200, 200, flip); // width, height, flip
	await webcam.setup(); // request access to the webcam
	await webcam.play();

	const you = document.querySelector('#you')
	you.appendChild(webcam.canvas);
	play();

}
- When the computer makes a decision what to play and figured out what the user showed in the webcam, show the results and a replay button.
For this we need to keep track of what the webcam as seen in each frame. Let's update the predict function like so:
async function predict() {
    const prediction = await model.predict(webcam.canvas);

	// adding the probability that the image contains a rock, paper, or scissors to our global variables
    rock += prediction[0].probability;
    paper += prediction[1].probability;
    scissors += prediction[2].probability;
}
Then we can create a function called check to see who the winner is:
function check() {
	// Choose the computer's choice
	const computerChoice = parseInt(Math.random()*3);

	// Determine our choice by using predict
	let yourChoice;
	if(rock > paper && rock > scissors) {
		yourChoice = 0;
	} else if(paper > scissors) {
		yourChoice = 1;
	} else {
		yourChoice = 2;
	}

	// Display the results
	let answer;
	if(yourChoice === computerChoice) {
		answer = 'TIE';
	} else if(yourChoice === 0 && computerChoice === 2) {
		answer = 'YOU WIN';
	} else if(yourChoice === 1 && computerChoice === 0) {
		answer = 'YOU WIN';
	} else if(yourChoice === 2 && computerChoice === 1) {
		answer = 'YOU WIN';
	} else {
		answer = 'YOU LOST';
	}

	const computer = document.querySelector("#computer");
	const you = document.querySelector("#you");
	const results = document.querySelector("#results");
	const reload = document.querySelector("#reload");

	reload.classList.remove('hide');
	computer.innerHTML = `<div>${emojis[computerChoice]}</div>`
	results.innerHTML = `
		<h1>${answer}</h1>
		<div>Your choice: ${emojis[yourChoice]}</div>
		<div>Computer choice: ${emojis[computerChoice]}</div>
	`
}
- If the user clicks the replay button, start again at step 3.
To do this we need to make sure when the user clicks Play again that the play() function is called. In the index.html:
<div id="reload" class='hide'>
	<a onclick='play()'>Play Again</a>
</div>
Then make sure our play function is global. At the bottom of script.js add:
window.play = play;
Now we are done.
Challenges
- Build a web site that will only reveal its contents if you show the web cam a certain hand signal
- Use Google Teachable Machine to train model using sound. Then build a website that will only reveal it's contents when you speak the password
- Use Google Teachable Machine using PoseNet. Then build a website that shows you various poses that you have to match